
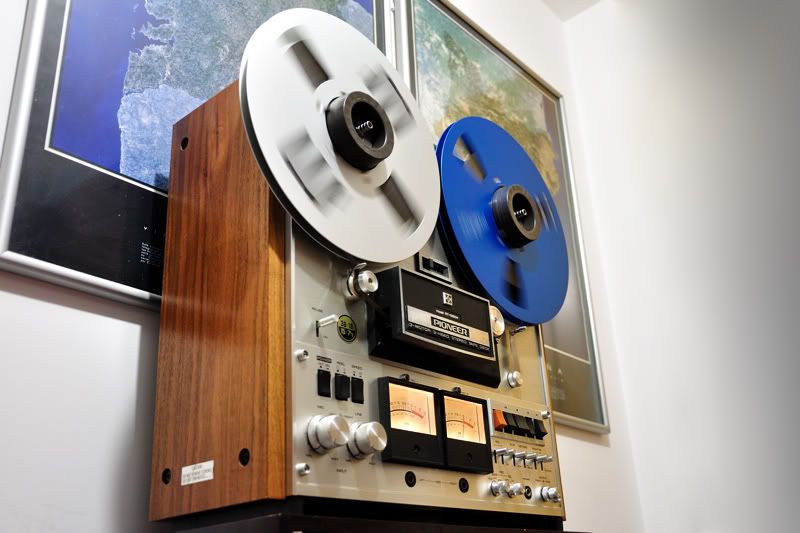
After change the capstan belt I shot this short video showing the Pioneer RT-1020H playing back the "Ghost In The Shell 2: Innocence" OST recorder hot at 19 cm/s (7.5 ips) on a Basf LP35 tape.
Saturday, January 1, 2011
Saturday, November 20, 2010
REP: Changing the Pioneer RT-1020H capstan belt
Easy, very easy. You won't need more than 15 minutes in most cases.
Tools needed:
- A new belt, of course
- Philips screwdriver
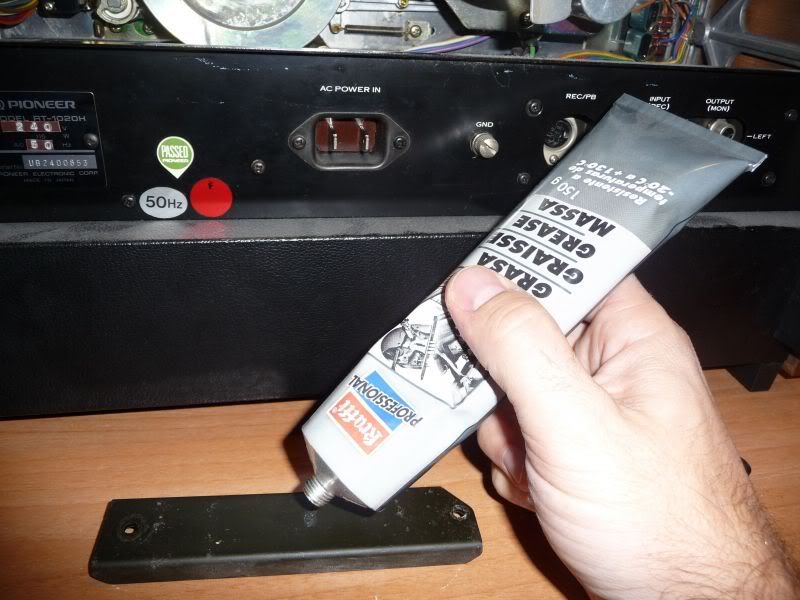
- Lithium grease
Steps:
0- Unplug the deck.
1- Remove the top-back panel. Just unscrew the philips screws where noted:
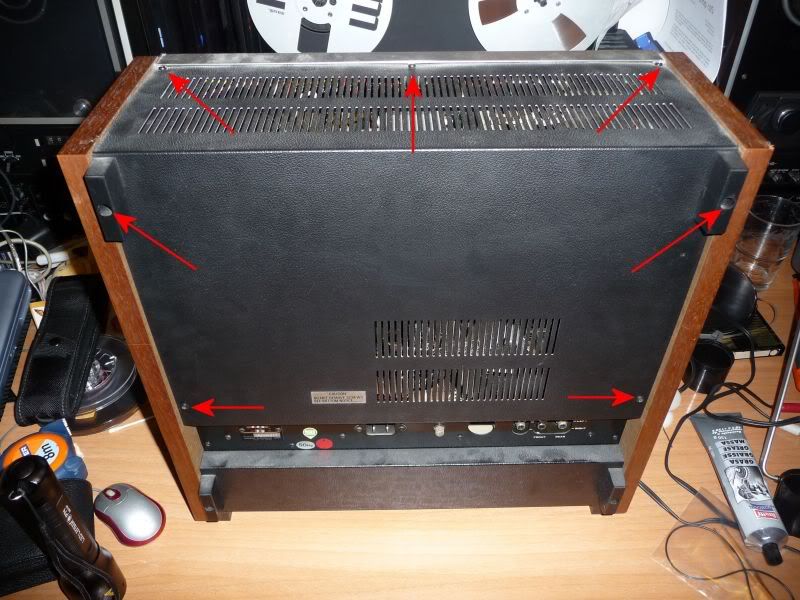
2- Be aware to remove the metal silver piece in the top-front of the deck before removing the entire back panel.
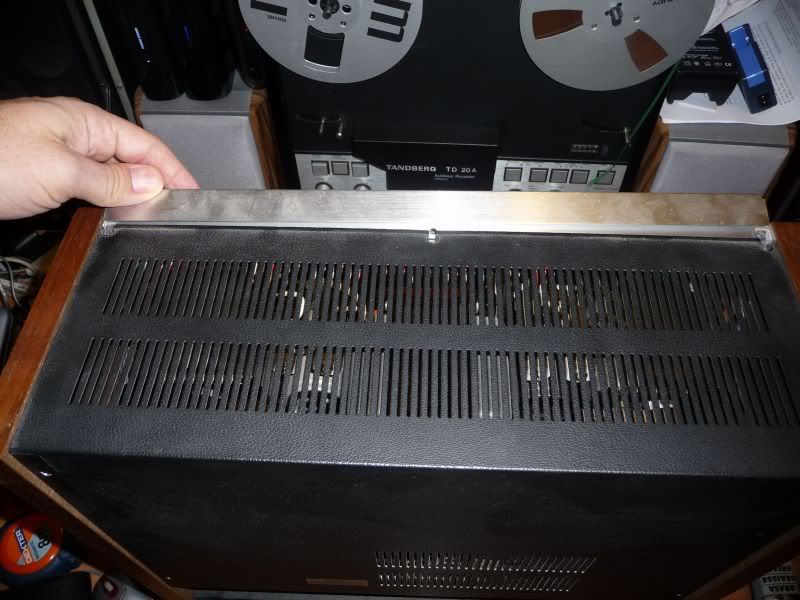
3- Remove the entire back panel.
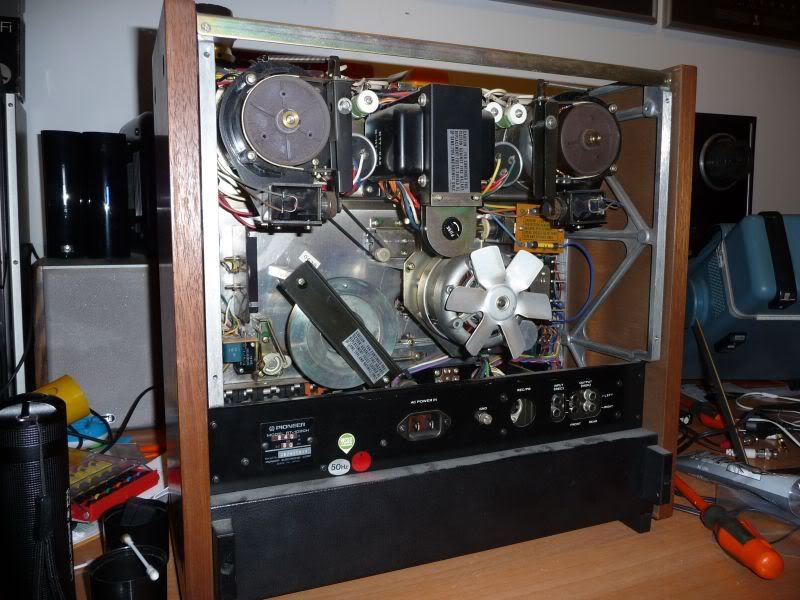
4- Remove the capstan wheel piece retainer showed in the previous pic. It only has two philips screws, but be aware, both have washers, so don't miss them!

5- Now you can put the belt "easily". First of all you need to know that the capstan motor pulley has two ways: one for 50 Hz and one for 60 Hz. The 50 Hz is the inner and the 60 Hz is the outer (from the motor). So take the belt with your hand and with some hability, try to put it in the motor pulley from the back. This is the hardest point, so don't worry if you can't do it in the first try.
Doesn't matter if you put the belt in the incorrect motor pulley way in this step. The goal is to put it in the motor pulley.
6- Gently pull the belt to the capstan fly wheel zone and put it around the wheel. The belt must be placed in the inner part of it.
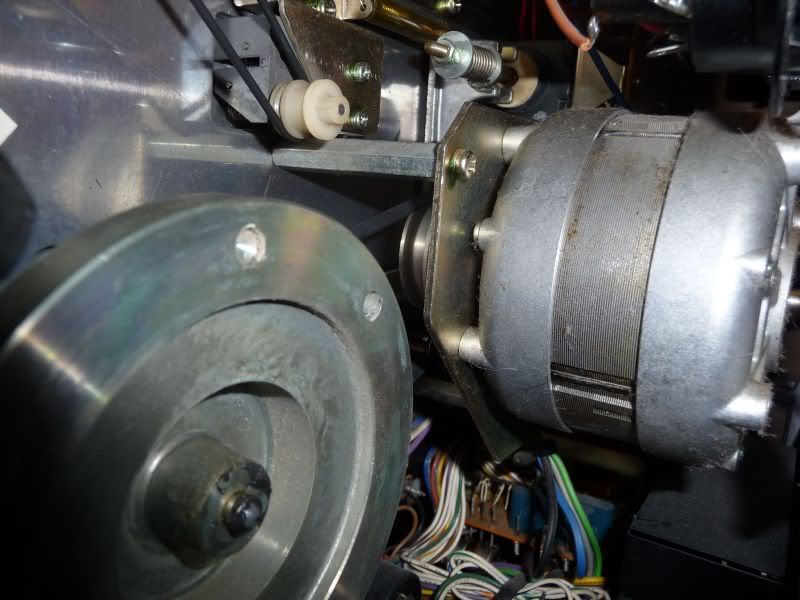
7- Ok, with the belt just replaced you need to be sure about which of the two motor pulley ways must it be placed. From your point of view, the closest to the motor would be for 50 Hz and the other for 60 Hz. To change it just use your fingers of a hand while the other hand rotates the capstan fly wheel.
8- Now the belt is in the correct place, so you must place the capstan wheel piece retainer back to its place. Remember, two screws and each with a washer, but previous to do it would be a good idea to place a bit of lithium grease in the contact zona of the fly wheel with this retainer.
9- The final step is the place the back panel to its original place taking in mind to place the metal silver piece in the top-front before, and over it, the panel and screw!
10- Test the job
Tools needed:
- A new belt, of course
- Philips screwdriver
- Lithium grease
Steps:
0- Unplug the deck.
1- Remove the top-back panel. Just unscrew the philips screws where noted:
2- Be aware to remove the metal silver piece in the top-front of the deck before removing the entire back panel.
3- Remove the entire back panel.
4- Remove the capstan wheel piece retainer showed in the previous pic. It only has two philips screws, but be aware, both have washers, so don't miss them!
5- Now you can put the belt "easily". First of all you need to know that the capstan motor pulley has two ways: one for 50 Hz and one for 60 Hz. The 50 Hz is the inner and the 60 Hz is the outer (from the motor). So take the belt with your hand and with some hability, try to put it in the motor pulley from the back. This is the hardest point, so don't worry if you can't do it in the first try.
Doesn't matter if you put the belt in the incorrect motor pulley way in this step. The goal is to put it in the motor pulley.
6- Gently pull the belt to the capstan fly wheel zone and put it around the wheel. The belt must be placed in the inner part of it.
7- Ok, with the belt just replaced you need to be sure about which of the two motor pulley ways must it be placed. From your point of view, the closest to the motor would be for 50 Hz and the other for 60 Hz. To change it just use your fingers of a hand while the other hand rotates the capstan fly wheel.
8- Now the belt is in the correct place, so you must place the capstan wheel piece retainer back to its place. Remember, two screws and each with a washer, but previous to do it would be a good idea to place a bit of lithium grease in the contact zona of the fly wheel with this retainer.
9- The final step is the place the back panel to its original place taking in mind to place the metal silver piece in the top-front before, and over it, the panel and screw!
10- Test the job
Friday, December 25, 2009


Monday, July 20, 2009
REP: Calibrating Pioneer RT-909 torgue
I calibrated the tension and backtension of a Pioneer RT-909 some months ago but I didn't remember that I had uploaded two videos about it.
The first shows the problem, only present in RWD mode:
This can be produced by you if you just play with the internal pots without knowing exactly what are you doing and without having the correct tools to calibrate the tension:
- The service manual where is described the procedure to follow and the order in which is needed to do it.
- A spring gauge, or even better, a tentelometer.
Notice that even when the tension is not correct in one transport function and rest seems to work OK, all the entire calibration is needed because the values of the rest impact in the other tensions.
This is the result after some time calibrating the pots until getting the correct readings in the tentelometer:
Friday, July 17, 2009


Subscribe to:
Posts (Atom)


